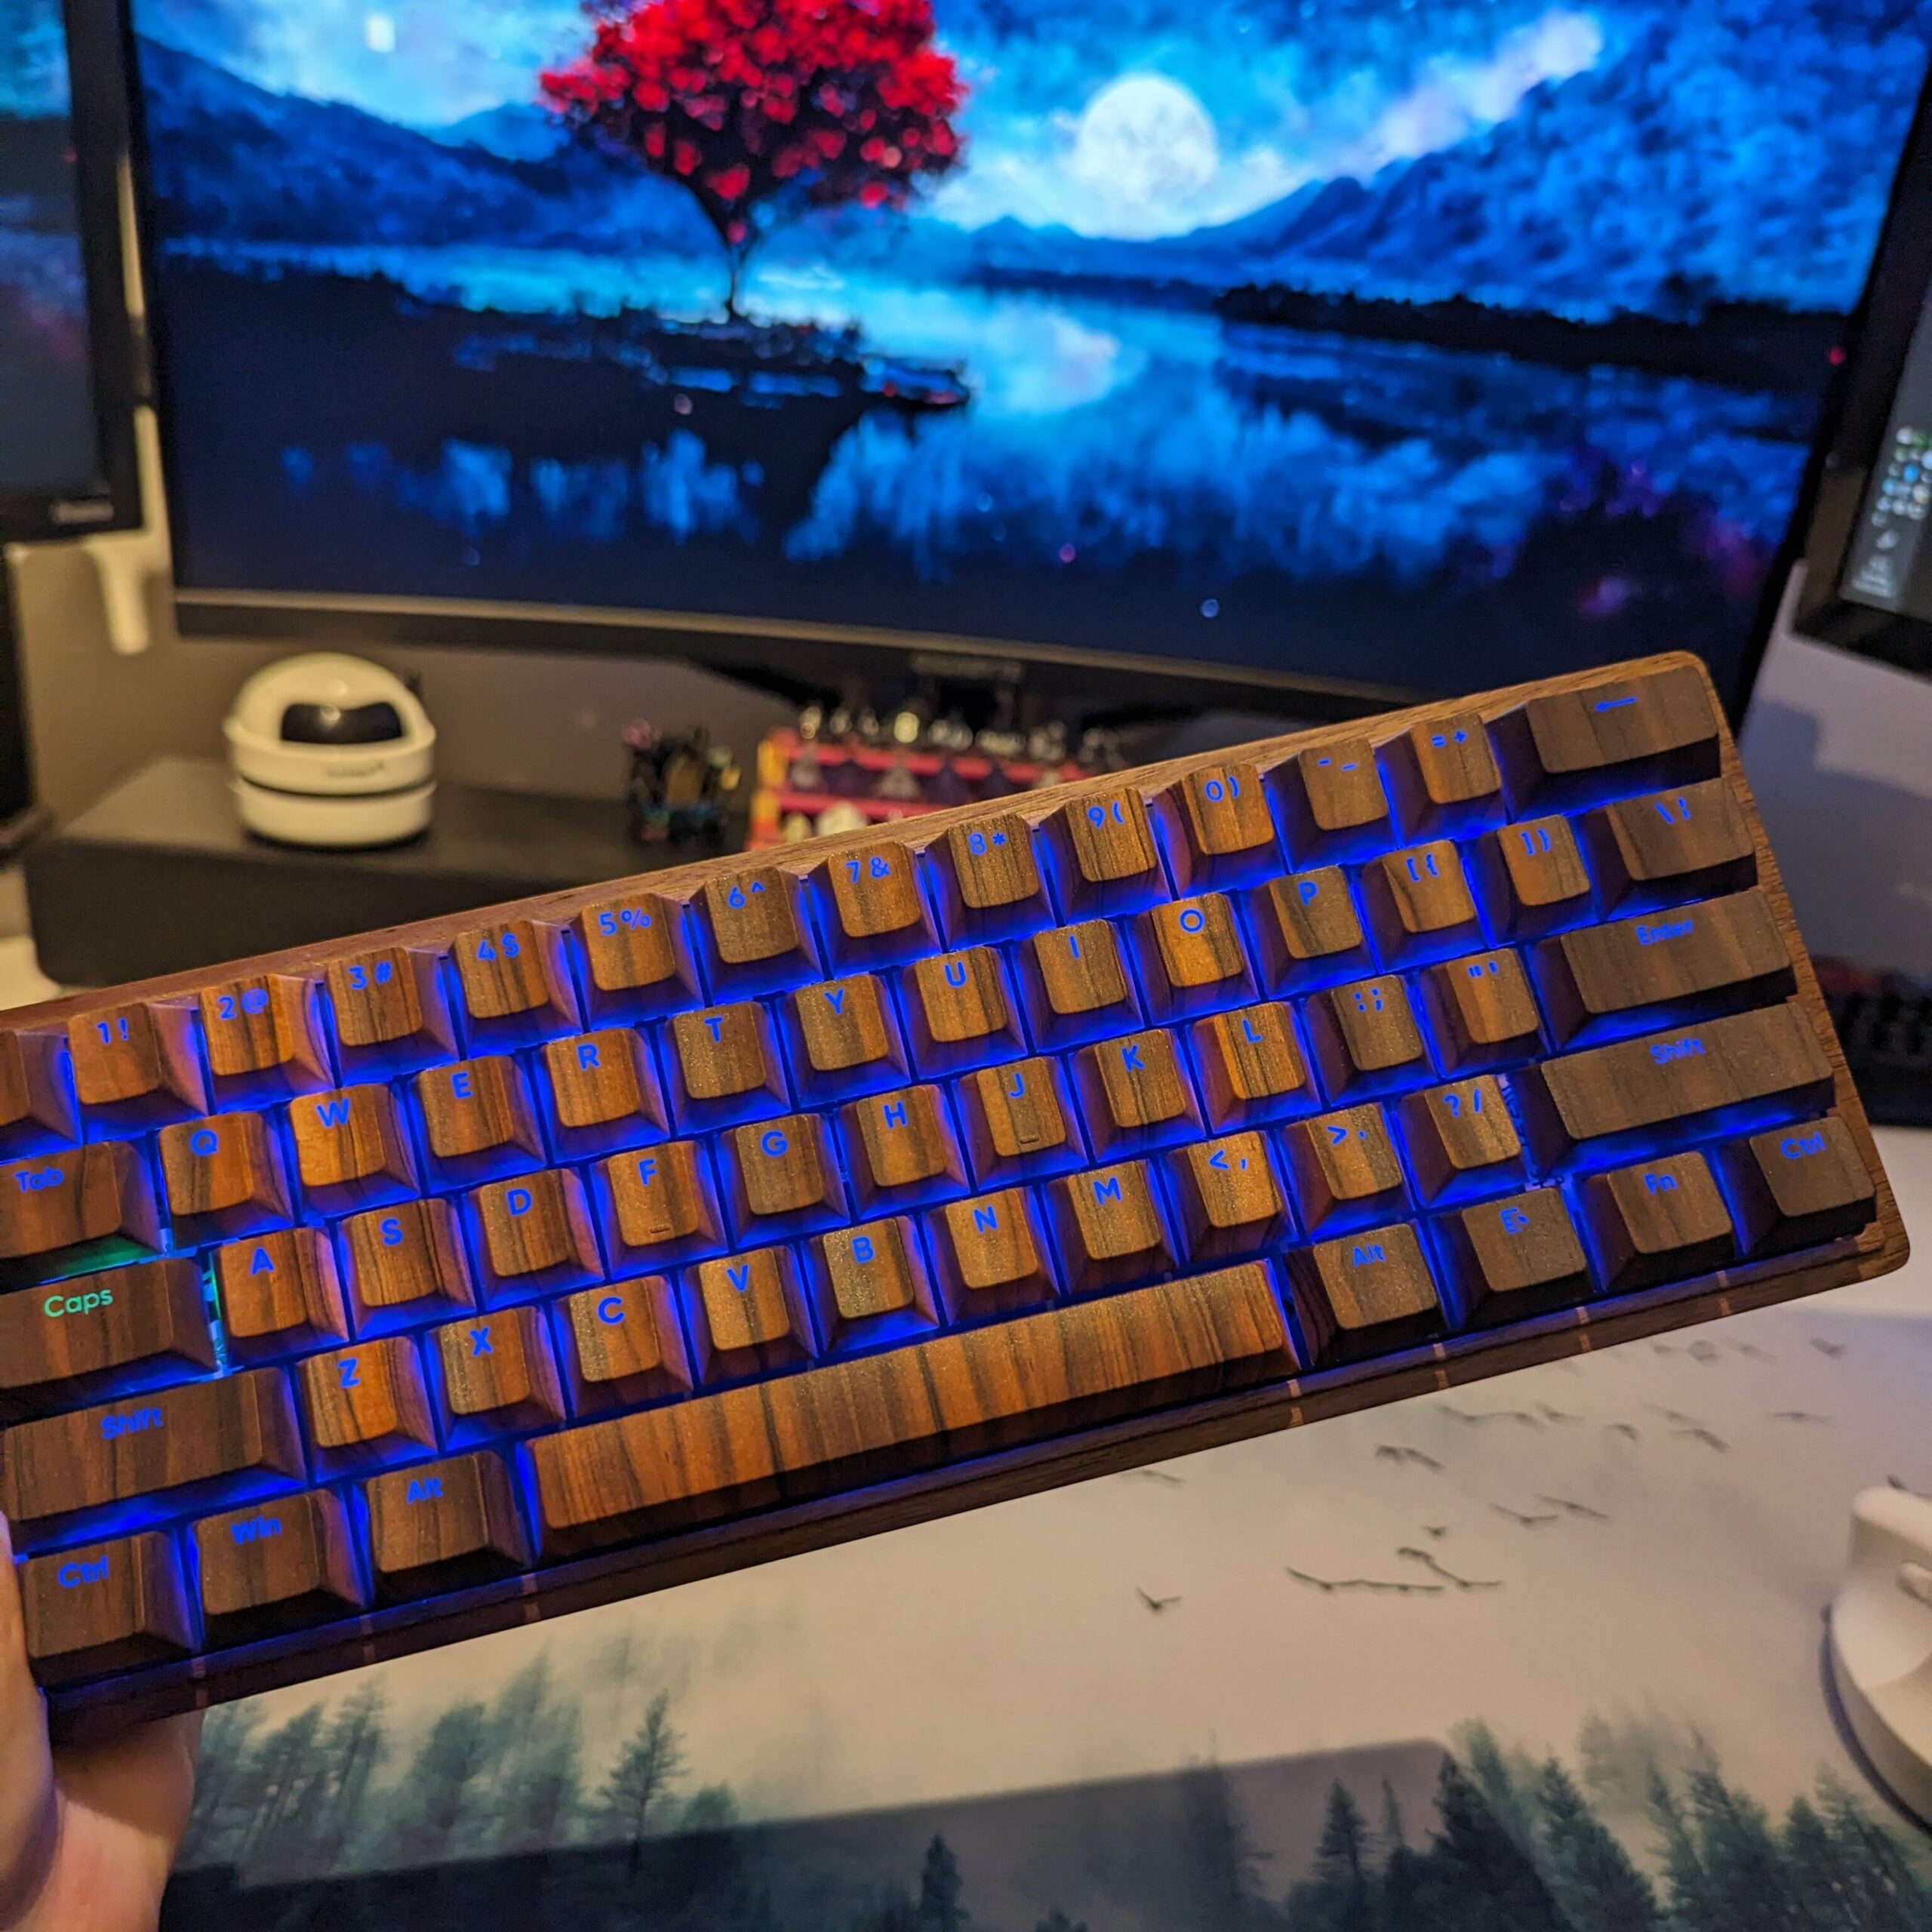
A while ago I started searching for a Bluetooth keyboard. I really wanted a 60% keyboard that I could take with me. A few weeks down this rabbit hole I was reading about keyboard builds and making one myself. My partner does tech projects quite often and has built a split keyboard before. We started researching and I decided on the M60. A cute 60% keyboard that works via Bluetooth and has backlight. The PCB (Printed Circuit Board) even comes with nearly everything on it already. So, easy build. Ideal for my first experience!
About M60 keyboard build
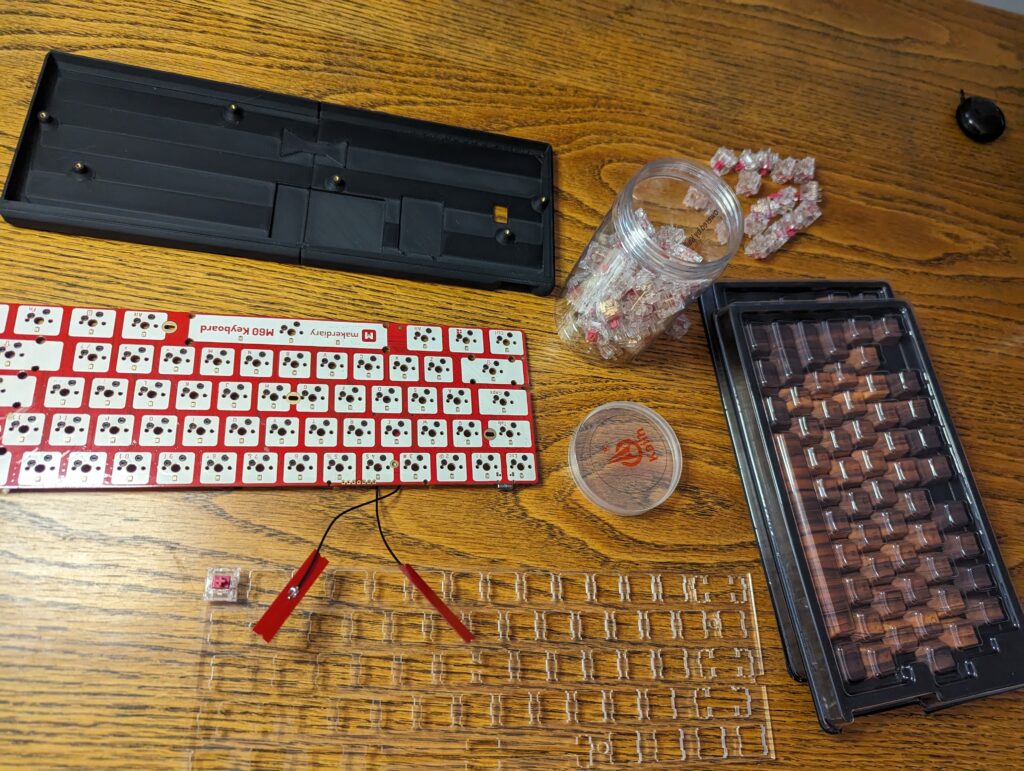
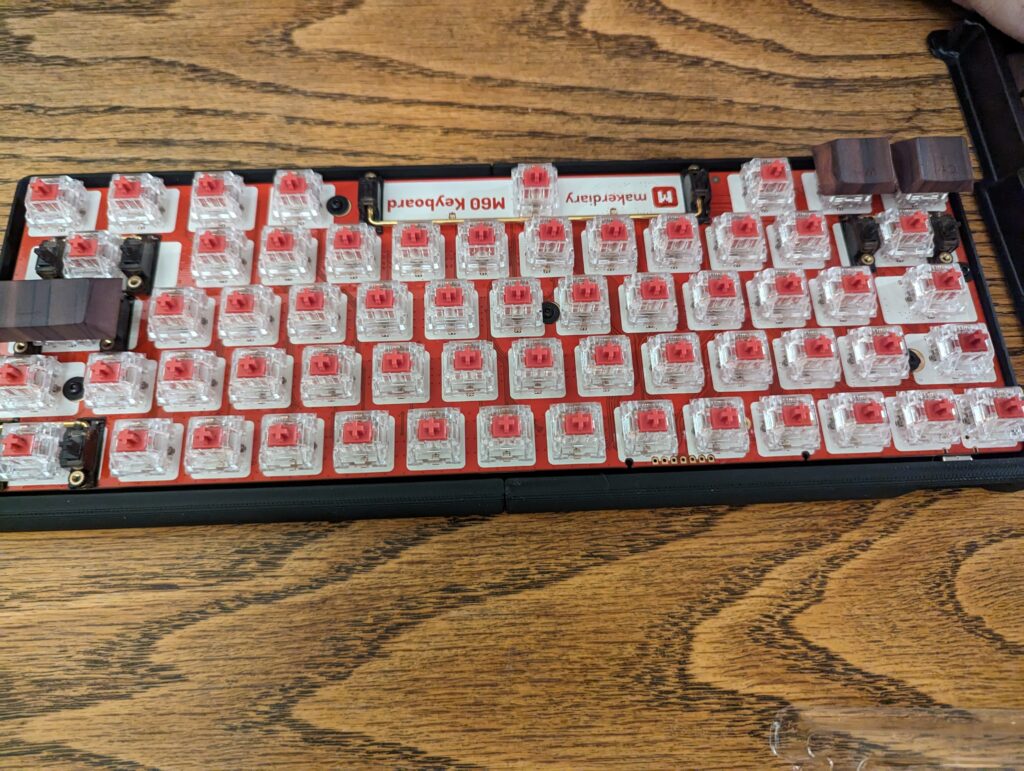
This keyboard is a 60% keyboard. There is a wiki on it on Makerdiary, the designer and seller of this kit. I have used this a lot, in the stage of first use and setup especially. Everything is explained really well. Except for the MCU (microcontroller unit) the PCB comes pre-assembled, including diodes and other parts. The plate comes with integrated Bluetooth and NFC antennas. This makes for quite an easy build, which was exactly what I wanted for my first keyboard project. However, easy as everything was supposed to be, there were a few issues we encountered while building the board. Putting on switches and keycaps, getting the board together, was not the problem. Small parts were already soldered and connected.
Examples of more difficult things were finding a battery (the one mentioned by Makerdiary is not available anymore and there are no specs available to find a replacement.), or having trouble fitting the board in the case I ordered. All in all I love the end result of this board. It was my first time choosing my own switches, caps and case and putting those together in the style I like is just amazing. Aside from that the keyboard works really well and typing is easy. I just had to get used to not having arrow keys and maybe I will look at macro or layer settings for that later. There is a default config for hjkl-style arrow navigation but I personally have never used this before and struggle a bit committing this to memory.
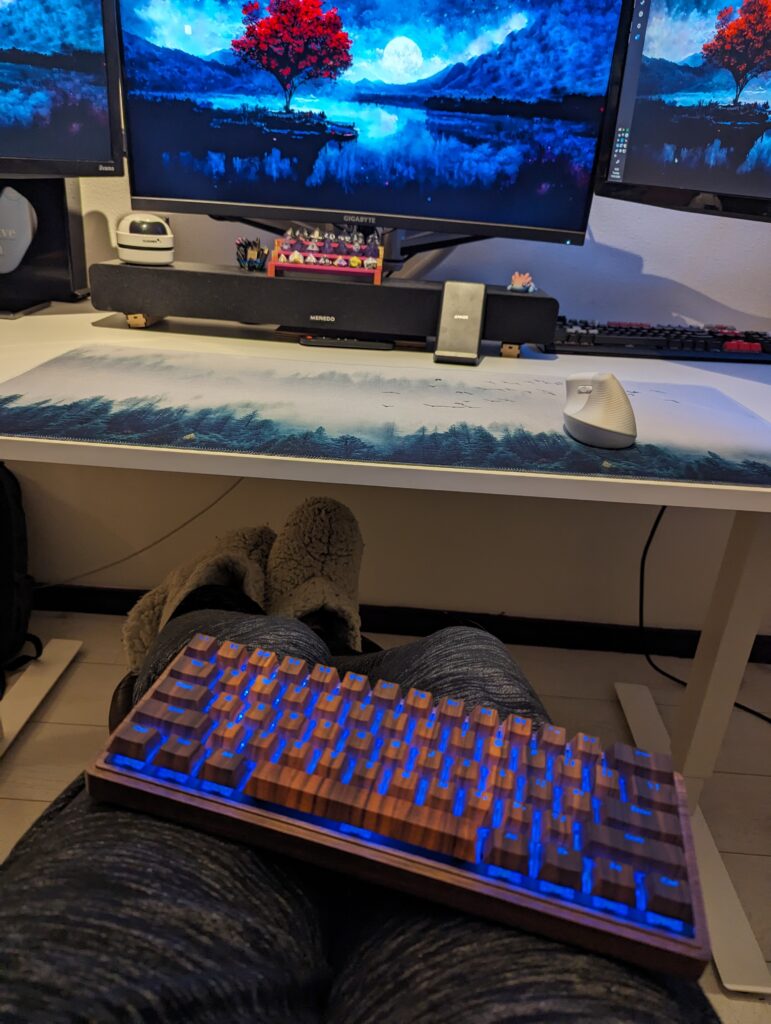
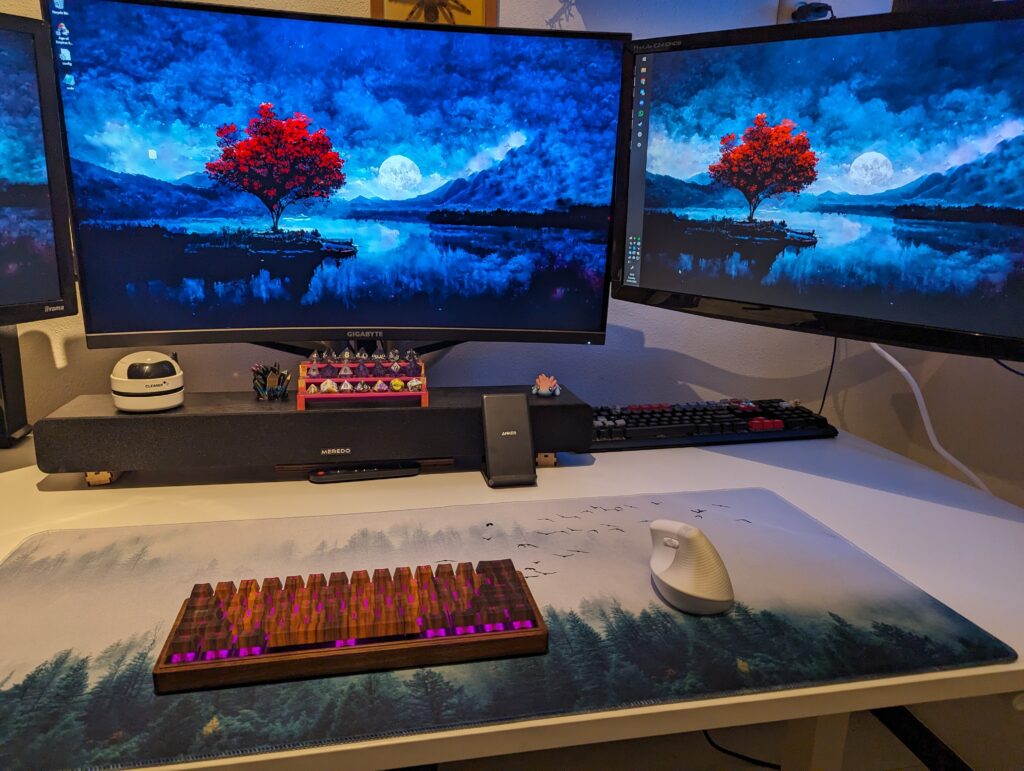
Perfect for blogging, traveling and working from the couch
Pros and cons
I love this Bluetooth keyboard and would do this all again knowing this. I do not mean to discourage anyone but would like to share my experience so you can use that information. Most of my cons are not a problem for me. I have needed help with these things and would like to share them with anyone who wants to make this Bluetooth keyboard, just keep them in mind. Let’s start with what’s really cool about this keyboard.
Pros
- Bluetooth
- Hot-swappable key switch mounts*
- RGB backlight
- Firmware is functional and open source, easy to use
- Lots of layers and macro options
- No soldering
- Needs no drivers or software – works everywhere
Cons – little problems we’ve encountered
- It does not fit all regular keyboard cases. The controller chip on the bottom of the plate makes it a little thicker. You will need about 8 mm space.
- Hard to find a good battery. I will link everything I used, but my battery is not the correct one. It works but required a different connector.
- The firmware is easy to use and open source. It is really hard to get KMK on this board and I would advice against it.
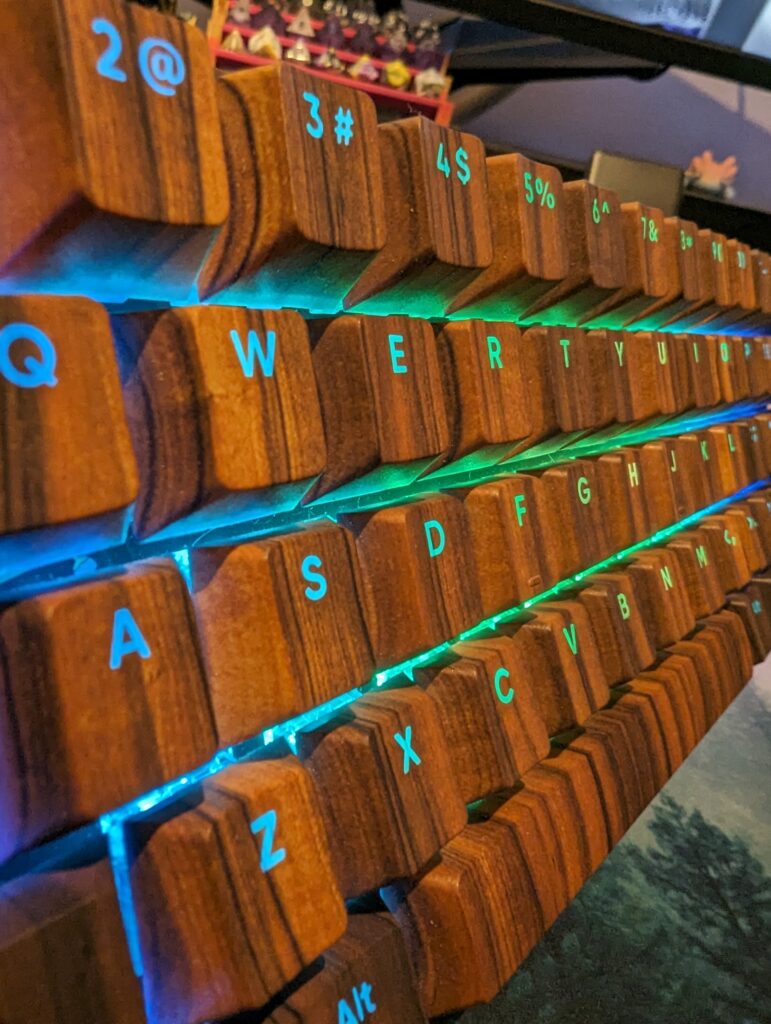
- North facing switches (upside down). For my keycaps this is no problem and those are the ones I really wanted. But, it might give trouble with some keycaps. *
- There is no real on/off button. This confused me at first because there is a button labelled “on/off button” on the PCB. It works for on but you’ll have to assign a key for turning off.
Parts used
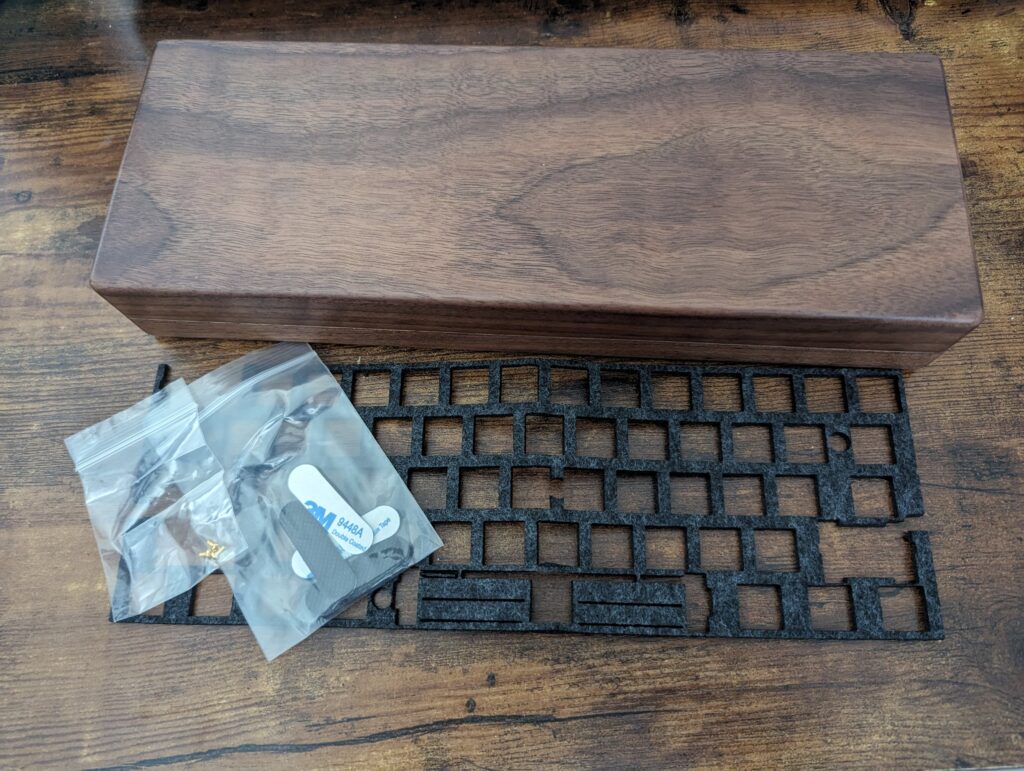
The parts I used are not a guideline or anything. This is what I used but do research and search for your own things. I want to give an idea about the parts you will need or might want to look into. This can give you an idea of expected costs. You can save on the case for example, especially if you own a 3D printer. I loved this walnut one so I will not. If you are looking for a cheap answer to your Bluetooth keyboard needs, buying a pre-made board is cheaper. This M60 does not have to be expensive, but it is easy to have the wrong expectations. Down here I will make a list with my components, with clickable links to them.
- PCB
- Plate
- Battery – Steelseries Arctis 9
- Connector cable
- Stabilizers
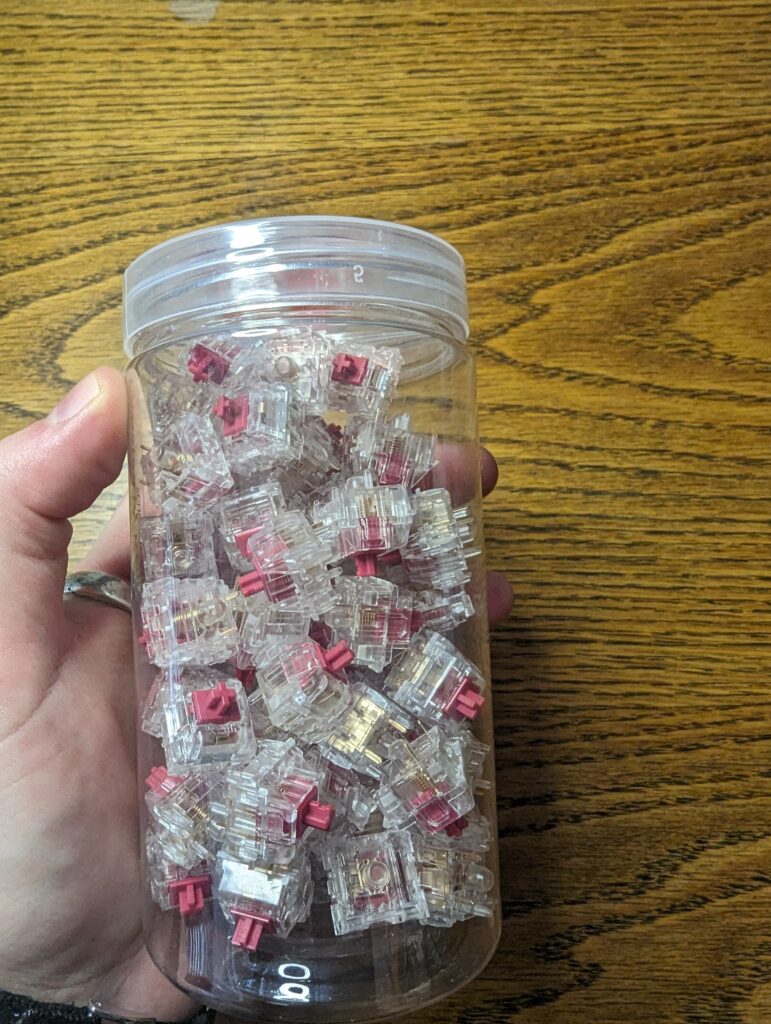
- Switches – Kailh burgundy linear
- Case – Walnut kit 1
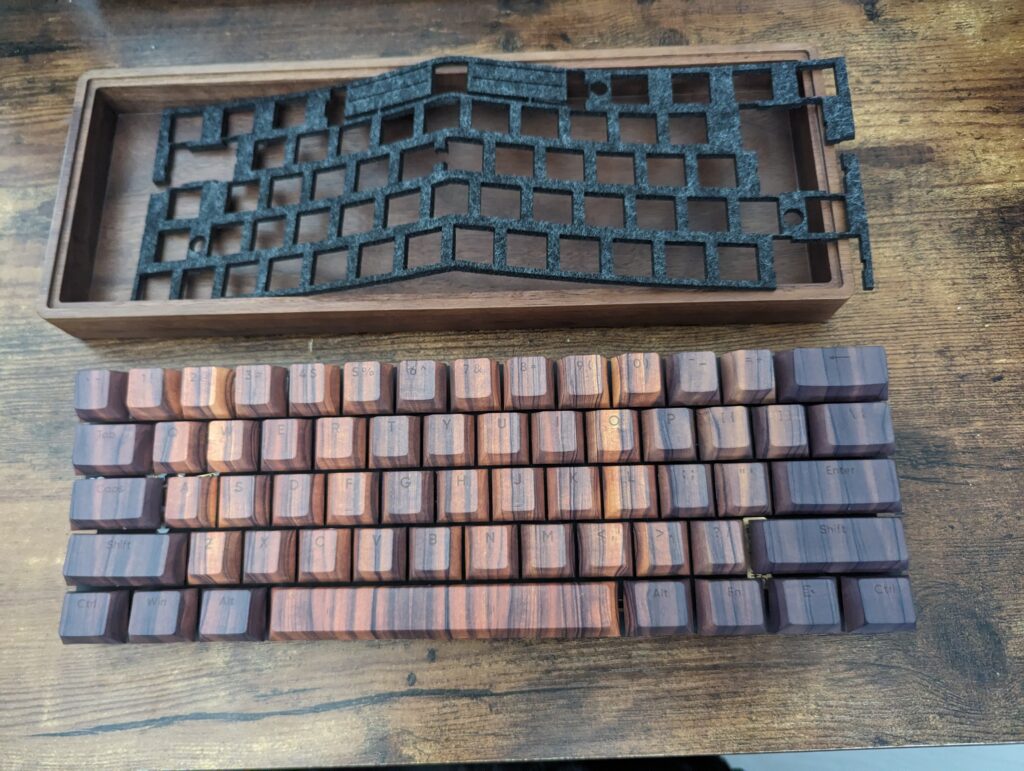
- Keycaps – dye subbed caps that look like walnut
- Foam – extra and not needed, but did decide to add this
- Thermal tape – always good to have this
Terminology
Some of the terms I used in this blog might not be familiar to everyone. Before starting this project they were not known to me anyway. I want to go into two things a little bit. Namely, North-facing switches and Hot-swappable key switch mounts.
North-facing switches
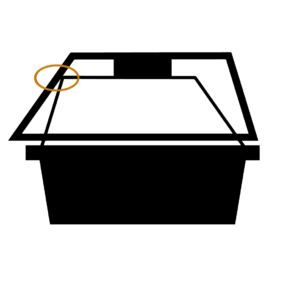
North facing switches have the LED located at the top (North) part of the PCB instead of South. This is common, but I was not familiar with this yet. The RGB light on North-facing switches shines through the letters on the keycaps. With South-facing switches, the RGB lighting looks more dim and fills up the space between keys as well. There are lots of specific differences that depend on taste. The message I wanted to get across is due to the LED being at the top of the switch, your typing experience can be limited or keycaps might not fit. This is especially the case for cherry profile keycaps. The switches can interfere with the caps, as shown on the picture on the right. My keycaps are cherry profile and they do fit, this sounds different to South-facing switches.To hear the sound of my keyboard, watch the YouTube video below.
Hot-swappable
A hot-swap component inside a keyboard (in this case key switches) can be replaced without requiring soldering. They can even be swapped without disconnecting. For me this was an extra reason to choose a DIY keyboard. If in the future my taste in switches changes, I can easily swap my switches. This enables me to enjoy the keyboard for longer.
Conclusion
Overall this build has cost me around 250 euros. This changes with different preferences. These prices are for EU/ Netherlands at the time of writing this blog. I have waited quite a while on my case, the other parts were here pretty fast. It does not take long to assemble.
I love the look and feel of this board. I wanted a Bluetooth keyboard that is 60%. It is exactly what I wanted and I am glad to have chosen this path. When this search started I was looking for a prebuilt keyboard just to buy and use. Keychron was a brand I was looking at.
Many of the boards I found were not what I wanted, not my style or really expensive (or a combo of these things). For a little more, this board is all wooden looking and has a lid. It has the switches I want to use on this keyboard and is hot swappable. Not all of the wireless boards I found were Bluetooth. All in all, I am really happy with this choice. I hope this blog either informed you or was enjoyable and gives an overall idea. As always, comments or my Instagram dm’s are always open. I wish you happy gaming!
Maybe my blog about my ergonomic mouse will also interest you. Here I explain which tools I in order to prevent repetitive strain injury and my experiences with my mouse.